 Installation Guide | Island Bracket & Island Support System
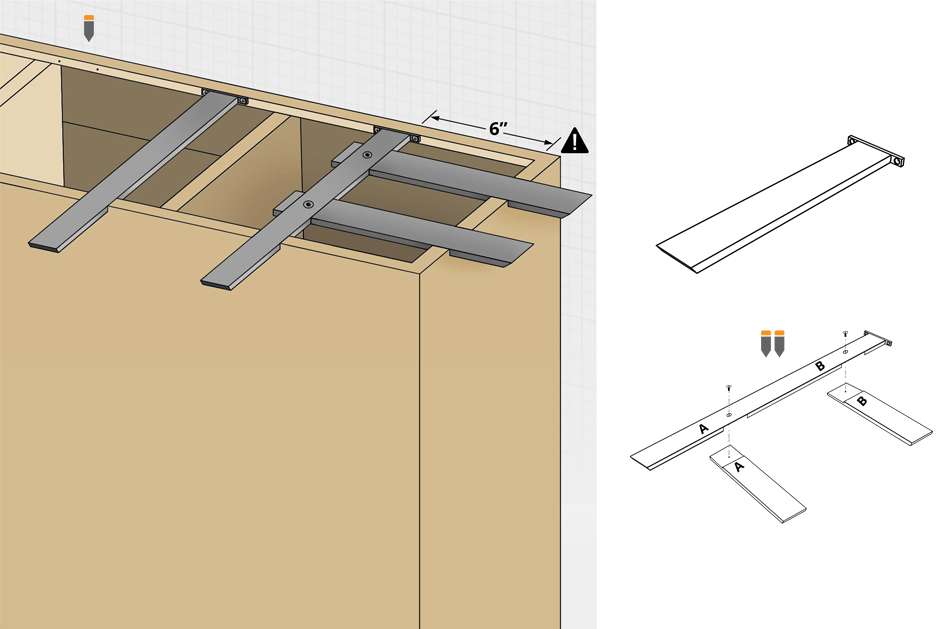
- Measure and mark the appropriate mounting locations on the inside face frame or front gusset and corresponding position on the back edge of the cabinet. We recommend starting the brackets 6” in
from the edge of the cabinet.
 NOTE: Assemble the Island System first to use as a guide for notching holes.
- Use a coping saw, oscillating multi-tool or router to cut a 2½” wide x ½” deep mounting channel in the back of the cabinet. In a frameless cabinet the back gusset may need to be reinforced. Repeat the process on the side wall for each extension, if installing a system.
 CAUTION: Do not cut into any of the factory structural supports in the corners of the cabinets.
- Place the Island bracket into the mounting channel and screw the mounting flange into the face frame or edge of the front gusset, using the #10 wood screws provided. Be sure the bracket is flush with the top edge of the cabinet.
- HINT: Pre-drill holes using a 7/64” bit. This will help ensure the wood doesn’t split.
- Prior to setting the top in place, run a bead of high-quality silicone adhesive down the center of each bracket.
 ISLAND SUPPORT SYSTEM ASSEMBLY:
- Connect extensions to island bracket by matching A-to-A and B-to-B.
- Use the provided screws and firmly attach the pieces together.